
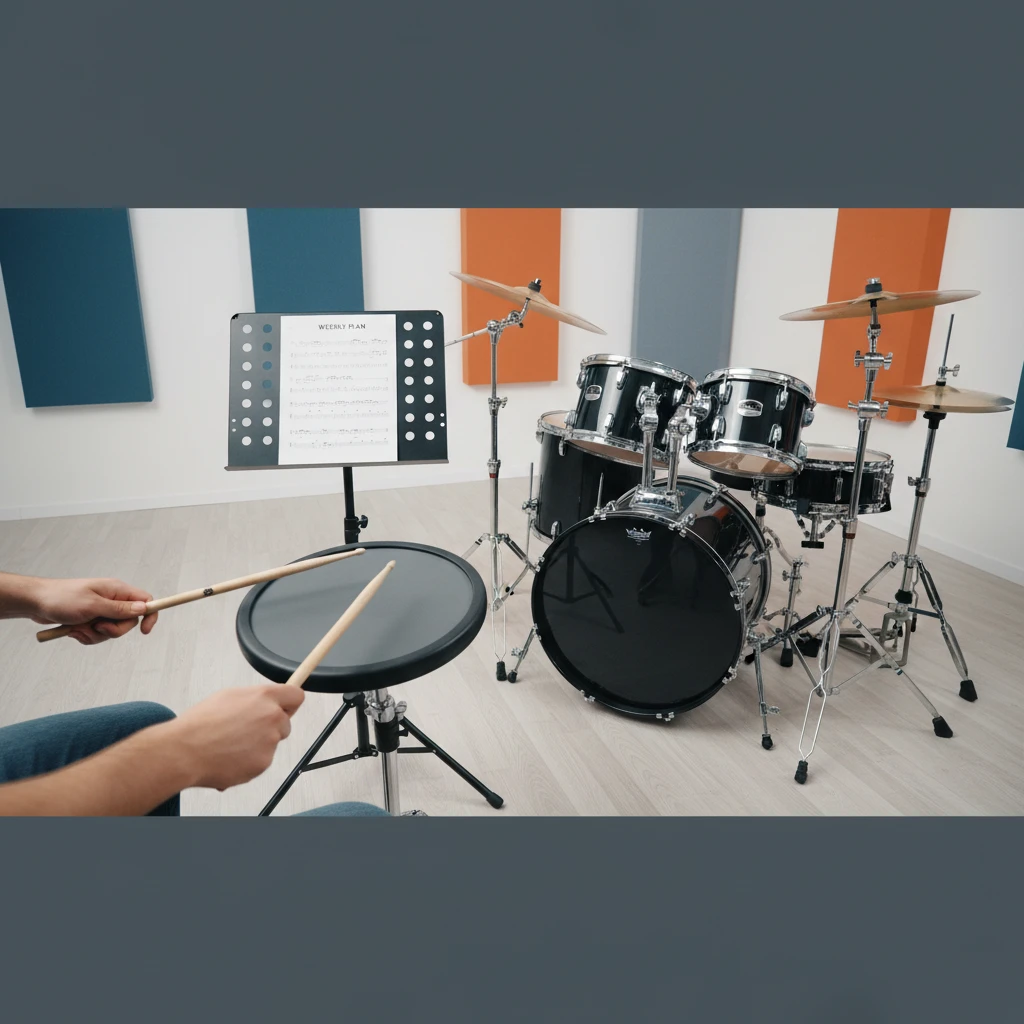
Most beginners do not fail at drums because they lack talent. They stall because they sit down, bash around for twenty minutes, play the one groove they already know, and call it practice. It feels productive. It is mostly repetition of comfortable habits. A real routine is different: it has a shape, a purpose for every minute, and a way of showing you whether you improved. The plan below comes from the kind of structure drum teachers have used for decades, trimmed down for people who are just starting out and may only have thirty minutes on a good day.
Why a Routine Beats Random Playing
Your hands and feet learn through repetition, but only accurate repetition. Motor skills, the kind of learning involved in drumming, are built when you slow down, perform a movement correctly many times, and then gradually raise the difficulty. If you play at a speed where you make mistakes, your brain stores the mistakes along with the good attempts.
A routine solves three common problems at once:
- It removes decision fatigue. You do not waste the first ten minutes wondering what to play.
- It covers every skill. Technique, timing, coordination, reading and musicality all get attention instead of just your favorite one.
- It makes progress visible. When you do the same exercises each week, you can notice that last month’s struggle now feels easy.
Short, frequent sessions also win over long, rare ones. Four sessions of 30 minutes will do more for you than one two-hour marathon on Sunday, because sleep helps your brain consolidate movement patterns. If you can only manage 15 minutes, that still counts. Shrink each block in the plan rather than skipping the day.
Before You Play: Setup That Prevents Bad Habits
Many beginner problems, such as sore wrists, a tense neck, and uneven strokes, begin with a poor setup rather than poor effort. Spend five minutes checking these basics before starting your routine, and recheck them every few weeks.
Throne Height and Posture
Sit so your thighs slope slightly downward, with your knees a little lower than your hips. Your back should be upright but relaxed, not slumped and not stiff. If your knees are higher than your hips, you will tire quickly and your bass drum foot will lose control. Your feet should reach the pedals without stretching.
Drum and Cymbal Position
Place the snare near your belly button height, roughly at the level where your forearms can rest almost parallel to the floor when you hold the sticks. Tom and cymbal stands should be reachable without twisting your torso or lifting your shoulders. If you must strain to hit something, move it. A kit is meant to be arranged around your body, not the other way around.
Grip Basics
Hold the stick about a third of the way up from the butt end, at the balance point where it bounces freely. Pinch it gently between your thumb and index finger, and let the other fingers wrap loosely. A common beginner error is squeezing the stick like a hammer. A tight grip kills the rebound, and the stick should feel like it is bouncing back to you rather than being dragged out of the drum. Think of holding a small bird: firm enough that it will not fly away, soft enough that you would not hurt it.
The 30-Minute Daily Template
Here is a template you can follow on most days. Adjust the timings if you have more or less time, but keep the order, because each block prepares you for the next.
- Minutes 1-5: Warm-up on a practice pad or snare
- Minutes 6-12: Rudiments and stick control
- Minutes 13-20: Grooves and foot coordination on the full kit
- Minutes 21-25: Fills and transitions
- Minutes 26-30: Playing along with music or free play
Notice that the free, fun part comes last. It is a reward, and it also lets you apply what you just practiced in a musical setting. Use a metronome (a simple click) for at least the first four blocks.
Block One: The Warm-Up (5 Minutes)
Treat your forearms and hands like an athlete treats the muscles before a run. Cold muscles with fast strokes lead to tension and, over time, to strain.
Step-by-Step Warm-Up
- Shake out your hands and roll your wrists in slow circles for about 20 seconds.
- Set the click at 60 beats per minute. Play slow, even quarter notes on the pad, alternating right and left hands. Let each stick rebound fully. Do this for one minute.
- Move to eighth notes (two strokes per click) for one minute, still at 60 BPM.
- Play sixteenth notes (four strokes per click) at 60 BPM for one minute. These feel fast at first; keep your shoulders loose.
- Finish with a minute of relaxed single strokes with no click, focusing only on how the stick feels.
If you notice any pain, stop. Tightness or mild fatigue is normal; sharp or lingering pain is not. Lower the stick height, relax the grip and, if the pain persists, speak to a teacher or health professional.
Block Two: Rudiments and Stick Control (7 Minutes)
Rudiments are the basic vocabulary of drumming, the sticking patterns from which fills, grooves and solos are built. There are a few dozen standard ones, but as a beginner you can get enormous value from just four. The Percussive Arts Society maintains the widely recognized list of 40 international drum rudiments, which is a useful reference once you outgrow the basics: Percussive Arts Society.
The Four Starter Rudiments
1. Single Stroke Roll
Alternating hands: R L R L R L R L. This is the foundation of everything. Practice it at several speeds, always keeping the notes evenly spaced and equally loud.
2. Double Stroke Roll
Two hits per hand: R R L L R R L L. The first stroke is a normal drop; the second is a controlled bounce. Beginners often get a loud first note and a weak second one. Slow down until both sound identical.
3. Paradiddle
R L R R, L R L L. It mixes singles and doubles and teaches your hands to switch lead. You will use it constantly in fills and around the kit.
4. Flam
A quiet grace note immediately before a louder main note, such as lR or rL. It adds thickness and is a first step toward expressive playing.
How to Practice Them
Spend about a minute and a half per rudiment. Start at a tempo where every note is clean, usually 60 to 70 BPM. Play it for 30 seconds, rest, and repeat. Only raise the tempo by 4 to 5 BPM when you can play the pattern correctly several times in a row. This is slow, and that is exactly the point. Teachers often repeat the line attributed to many players: if you cannot play it slowly, you cannot play it fast.
A useful trick is to alternate between soft and loud versions. Play the paradiddle quietly for eight bars, then at a medium volume, then loudly. Dynamic control is one of the biggest differences between a beginner and an intermediate drummer, and it starts here.
Block Three: Grooves and Coordination (8 Minutes)
Now move to the kit. A groove is the repeating pattern that holds a song together, and your job at this stage is to make it steady, not fancy.
Groove One: The Basic Rock Beat
Hi-hat on every eighth note, bass drum on beats 1 and 3, snare on beats 2 and 4. Count out loud: “1 and 2 and 3 and 4 and.” Counting aloud feels silly for a day or two, and then it becomes the most useful tool you have. If your voice and your limbs disagree, slow down until they match.
Groove Two: Bass Drum Variations
Keep the hi-hat and snare exactly the same and move only the bass drum. Try these placements:
- Beats 1 and the “and” of 2, then beat 3
- Beats 1, 3 and the “and” of 3
- Beats 1 and 3, plus the “and” of 4
This builds limb independence, the ability to let one limb do something different from the others. It is the skill that feels hardest at first and pays off most later.
Groove Three: Quarter-Note Ride Pattern
Switch the hi-hat to the ride cymbal or play quarter notes on the hi-hat. The change in texture sounds mature and teaches you how the same drum pattern can feel quite different when the top layer changes.
A Quick Method for Learning Any New Groove
- Play each limb on its own for four bars.
- Add two limbs together, such as hi-hat and snare.
- Add the third limb, the bass drum.
- Play the whole pattern at a slow tempo for two minutes without stopping.
- Raise the tempo slightly only if every bar is steady.
The point of the two-minute rule is endurance. Plenty of beginners can manage a groove for two bars; fewer can keep it perfectly for two minutes, and that is what a band will ask of you.
Block Four: Fills and Transitions (5 Minutes)
A fill is a short phrase that connects one section of a song to the next. The biggest beginner mistake is playing a fill that is too ambitious and then losing the beat. A good fill is one that lands back on beat 1 of the next bar without any hesitation.
Start With Simple Fills
- Snare-only fill: Play eight sixteenth notes on the snare in the last half of the bar, then return to the groove.
- Snare to toms: Play four eighth notes on the snare, then move down the toms one note each.
- Paradiddle fill: Play a paradiddle across the snare and two toms, and end with a crash on beat 1.
Practice the “four bars of groove, one bar of fill” structure. Count it in your head: 16 beats of groove and 4 beats of fill. Loop it for the full five minutes. The goal is not showing off, it is learning to leave the groove and come home safely every time.
Block Five: Play Along and Play Freely (5 Minutes)
Pick a song with a clear, steady beat and a moderate tempo. Pop and classic rock tracks work well, since the drum parts tend to be straightforward. Listen for the structure first: intro, verse, chorus. Then play only the basic groove through the whole song, adding a simple fill before each section change.
You will quickly discover that real songs are less forgiving than a click. The tempo may drift slightly, a section may be longer than you expected, and you must listen constantly. That is exactly why this block matters. It converts exercises into music.
If you still have a minute or two, improvise. Make noise, try ideas, play something silly. Creativity needs some unstructured time, and if practice never feels fun, you will not keep doing it.
Working With a Metronome Without Hating It
Most beginners dislike the click because it exposes their timing, which is precisely why they need it. A few tips make it far less painful:
- Start slower than you think. 60 BPM is a perfectly good tempo for building control.
- Listen for the lock. When your stroke lands exactly on the click, the two sounds merge. Chase that feeling.
- Try the click on beats 2 and 4 only. This forces you to feel beats 1 and 3 yourself, which strengthens your internal pulse.
- Leave the click off sometimes. Practice a bar with the click, then a bar without. You will learn quickly how steady you really are.
Learning to Read and Count Rhythm
You do not need to read music to play drums, but a little reading speeds up learning enormously. Spend two or three short sessions a week on rhythm basics, outside your 30-minute template or by swapping with the groove block on some days.
Begin with note values: whole, half, quarter, eighth and sixteenth notes. Learn how many of each fit into one bar of 4/4. Then count aloud:
- Quarter notes: 1 2 3 4
- Eighth notes: 1 and 2 and 3 and 4 and
- Sixteenth notes: 1 e and a 2 e and a 3 e and a 4 e and a
Clap each pattern before you play it. If you can clap and say it, your hands will usually follow. If you cannot, the problem is not your hands; it is your understanding of the rhythm.
A Sample Weekly Plan
Variety across the week prevents boredom and ensures that everything gets attention. Here is a realistic plan for a beginner with five practice days:
Monday: Foundation Day
Follow the full template. Focus on single strokes and the basic rock beat. Keep the tempo comfortable.
Tuesday: Hands Day
Spend extra time on rudiments, expanding that block to 12 minutes. Add double stroke rolls and flams. Cut the fill block shorter.
Wednesday: Feet and Independence Day
Spend 12 minutes on the bass drum variations and hi-hat foot patterns. Add open and closed hi-hat notes if you feel ready.
Thursday: Fills Day
Practice fills in different positions in the bar. Try a fill that starts on beat 4, then one that starts on beat 3, and compare the feel.
Friday: Song Day
Shorten the technical blocks to 15 minutes total and spend the rest playing along with two or three songs. Record yourself on a phone if possible.
Take Saturday and Sunday lightly: either rest or play for pleasure with no goals. Rest is part of the process, as your hands and brain need recovery time.
Record Yourself and Track Progress
Listening back is uncomfortable and incredibly useful. A phone placed a few feet from the kit is enough. Record the same groove once a week, and compare. You will hear things you miss while playing: rushed fills, a weak snare, an uneven hi-hat.
Keep a simple practice log with the date, the exercises and the tempos. Something like “Paradiddles at 72 BPM, clean” gives you a clear target for the next session. After a month, flipping back through the log shows you how far you have come, and that is a powerful motivator when you hit a plateau.
Practice Pad Versus Full Kit
If you live in an apartment or share walls, you might think you cannot practice properly. In fact, a quality practice pad is one of the most effective tools you can own. Pads are quiet, they reveal flaws in your stroke because there is less room to hide, and they let you focus on technique without distraction. Many professionals still use them daily.
The best approach is to combine both: do your warm-up and rudiments on the pad, then move to the kit for grooves and fills. If you only have a pad, the rudiment and timing blocks still give you real progress, and you can use a rolled towel or a cushion as a stand-in for the bass drum rhythm by tapping your foot.
Protect Your Hearing and Your Body
Drums are loud. An acoustic kit can reach volume levels that, with repeated exposure, damage hearing over time. The U.S. National Institute on Deafness and Other Communication Disorders explains how noise-induced hearing loss happens and how to prevent it: noise-induced hearing loss guidance. Take its advice seriously and wear earplugs designed for musicians, which reduce volume evenly without muffling the sound. Foam plugs from a pharmacy work in a pinch, though musician-grade ones keep the tone clearer.
Look after your body as well:
- Take a short break every 20 to 30 minutes and stretch your wrists, forearms and shoulders.
- Drink water; drumming is physical.
- Keep your breathing steady. Many beginners hold their breath on tricky passages, which increases tension.
- Stop if something hurts, rather than pushing through.
Common Beginner Mistakes and How to Fix Them
Practicing Too Fast
Speed feels exciting, but it hides weaknesses. If you cannot play a pattern cleanly three times in a row, drop the tempo by 10 BPM.
Ignoring the Weaker Hand
Most people have a dominant hand that leads. Counter this by starting rudiments with your weaker hand half of the time, and by playing some grooves with the hands crossed or reversed.
Gripping Too Hard
If your forearms ache after a few minutes, your grip is probably too tight. Shake your hands out and aim for relaxed strokes with natural rebound.
Skipping the Hard Stuff
It is tempting to repeat what you already do well. For every minute you spend on something comfortable, spend a minute on something that frustrates you. That discomfort is where improvement lives.
Practicing Without a Goal
Before each session, write down one specific target: “play the basic rock beat for two minutes without a mistake at 80 BPM.” When you hit it, raise the bar. Without a target, you can drift for hours and improve very little.
Staying Motivated Over the Long Run
The first few weeks are exciting, the next few can be a slog. That is normal. Everyone goes through a period where the new skill is neither new nor impressive anymore. A few tactics help you push through:
- Set a small, concrete goal each month, such as learning a full song from start to finish.
- Practice at the same time every day. Habits stick when they are attached to a time and place.
- Play with other people. Even jamming with one guitarist reveals timing skills that solo practice cannot, and it makes the effort feel meaningful.
- Watch live drummers. Notice how relaxed good players look. Their strokes look effortless because they are efficient, not because they are lazy.
- Consider a teacher. A few lessons catch posture and grip problems early, before they harden into habits that are harder to unlearn.
Think of drumming progress like building a house. The foundation, meaning grip, posture, timing and basic rudiments, is invisible once the walls are up, yet everything depends on it. A beginner who spends the first three months on that foundation will usually overtake someone who rushed to flashy fills and had to go back to repair the basics later.
Start with the 30-minute template tomorrow, keep the metronome running, record yourself on Friday, and write down what you played. In a month you will hear the difference, and in six months you will be playing things that currently look impossible.


Deixe um comentário