Why the Right Pair of Sticks Matters More Than You Think
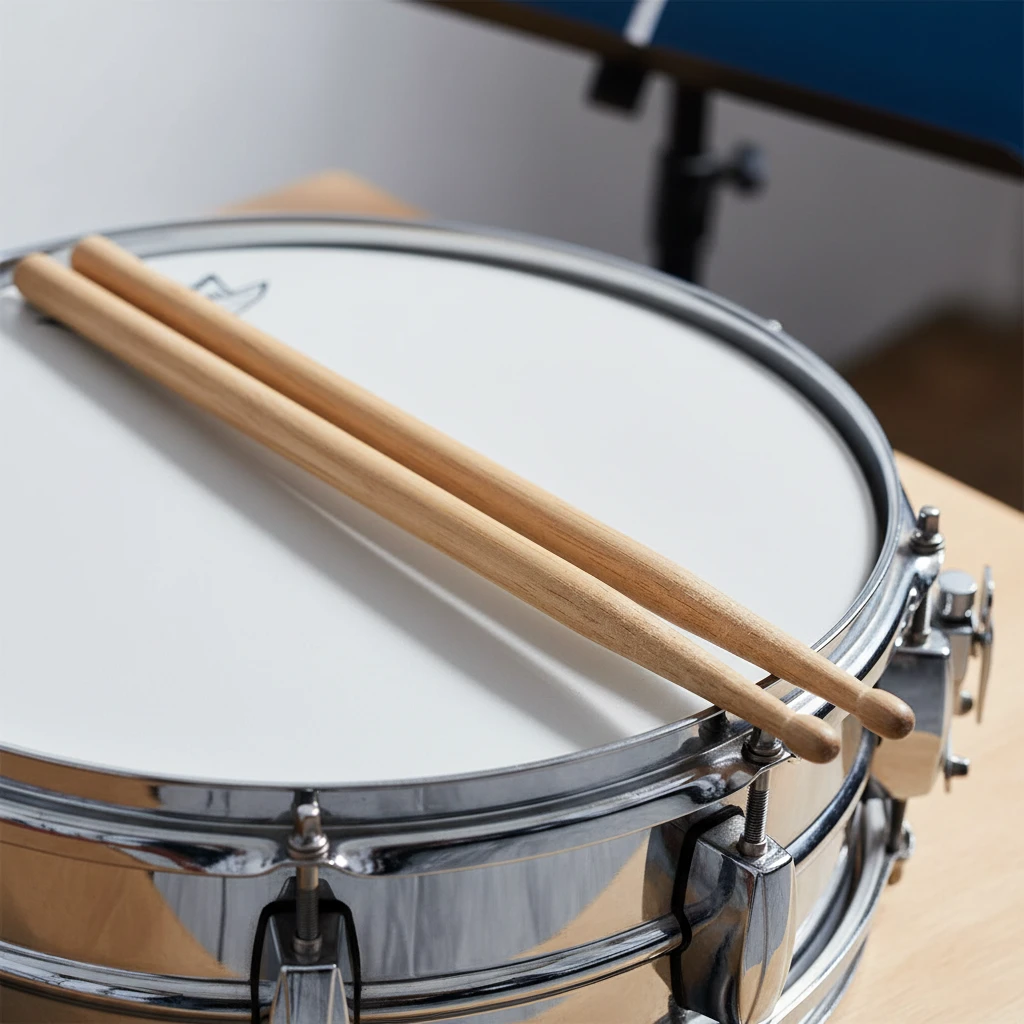
Most new drummers spend weeks researching kits, cymbals and pedals, then grab whatever sticks are sitting in the bin by the register. It is an understandable mistake. Sticks look like simple pieces of wood, and they cost less than a pizza. Yet they are the only part of the instrument that touches your hands every second you play. A pair that is too thick makes your fingers ache, a pair that is too light can leave you pounding to get volume, and a warped pair will quietly sabotage your rudiments while you wonder why your rolls sound lumpy.
Choosing well does not require a degree in lumber. It comes down to five things: diameter and length, wood type, tip shape, tip material, and finish. Once you understand what each one does, the wall of options at the music shop starts to look manageable. This guide walks through each factor, explains the labels printed on the shaft, and gives you a practical shopping routine you can use the next time you are standing in the aisle.
Decoding the Numbers and Letters on the Shaft
Look at any stick and you will see something like 5A, 7A, 5B or 2B. This system is common across most major makers, though it is not a strict international standard, so the exact dimensions shift a little from brand to brand. The general logic goes like this.
The Number: Thickness
The number refers loosely to diameter, and it works backward from what you would expect. A higher number usually means a thinner stick. A 7A is slimmer than a 5A, and a 5A is slimmer than a 2B. Think of it like gauge numbers on guitar strings in reverse logic: a bigger number, a lighter feel.
The Letter: Historical Use
The letters date back to older orchestral and band traditions. A was associated with dance band and orchestral playing, B with concert band, and S with street or marching use. Today the letters are mainly shorthand for how beefy a stick is within a given number. In everyday practice, the “B” models tend to be a little thicker than the “A” models with the same number, and they usually pack a bit more weight and volume.
Typical Dimensions
- 7A: roughly 0.54 inches (13.7 mm) in diameter and about 15.5 inches long. Light and nimble.
- 5A: roughly 0.565 inches (14.4 mm) in diameter and around 16 inches long. The all-rounder.
- 5B: roughly 0.595 inches (15.1 mm) in diameter. Fuller in the hand and a touch heavier.
- 2B: roughly 0.63 inches (16 mm) in diameter. Thick, heavy, and made for power.
Those figures are approximate because each manufacturer tweaks its own pattern, so a 5A from one company might feel slightly different from another’s. Treat the label as a starting point, not a guarantee.
Start With a 5A Unless You Have a Reason Not To
Ask ten teachers what a first pair should be and at least seven will say 5A. There is a good reason for that. The 5A sits in the middle of the range. It is thin enough to let you play fast, thick enough to produce a solid sound on a snare, and common enough that every store stocks it. If you end up taking lessons, your teacher will probably be using one, so you will be working with a similar feel.
That said, a 5A is not automatically right for everyone. Here is how to think about the alternatives.
When a 7A Makes Sense
The 7A is a good choice for younger players, for anyone with small hands, and for people who plan to play quietly at home in an apartment. It reacts quickly, which can make fast patterns feel easier. The trade-off is that a thin stick has less mass, so it can feel “skinny” if you hit hard, and it tends to wear out sooner when you play rim shots or heavy backbeats. Some beginners with big hands also find a 7A makes them squeeze too hard, which defeats the purpose.
When a 5B or 2B Makes Sense
If you are a larger person, if you gravitate toward rock, metal or loud gigging, or if you simply like a substantial grip, the 5B is worth testing. The extra mass helps the stick rebound with less muscle effort once your technique settles in. The 2B is more of a specialist tool. For the first few months it will probably feel like swinging a rolling pin, and fatigue can build quickly. Save it for later if you find you want it.
A Quick Hand-Size Guide
- Small hands or kids under about 10: 7A, or a dedicated junior stick if the length feels awkward.
- Average adult hands: 5A as the baseline, with a 7A or 5B as a second pair to compare.
- Large hands or heavy hitters: 5B first, then experiment.
Wood Types: Hickory, Maple and Oak
The material shapes how a stick feels in your hand, how long it lasts, and how much vibration reaches your wrists. Most beginner sticks are made from one of three woods. If you want a bit of background on how drumsticks have evolved and what they have been made from over the years, the Drumstick entry on Wikipedia offers a handy overview.
Hickory
Hickory is the default for good reason. It is dense but flexible, so it absorbs shock well and resists snapping. A pair of hickory sticks will usually survive months of daily practice if you are not hammering rims on purpose. The downside is that it is a bit heavier than maple, which some players notice after a long session. For a first pair, hickory is the safest bet.
Maple
Maple is lighter and faster in the hand. It suits players who want a gentle, springy feel, and it can be a pleasant option for jazz or quieter styles. The catch is durability: maple tends to splinter or break sooner, especially if you have a habit of hitting rim edges. Beginners who are still learning accuracy often go through maple pairs quicker than they expected.
Oak
Oak is the heavyweight of the group. It is denser, so it lasts a long time and hits with authority, but it transfers more vibration to your hands and feels stiffer. It can be tiring for a new player whose grip is still tense. Most beginners can skip it for now.
Quick Comparison
- Hickory: balanced, durable, shock-absorbing. Best all-round pick.
- Maple: light, fast, less durable. Good for soft playing or very small hands.
- Oak: heavy, long-lasting, stiff. Better suited to experienced players who want power.
Tip Shape: What Touches the Drum Matters
The tip, often called the bead, is where the stick meets the head and the cymbal. It determines the attack, the tone, and how defined your cymbal pattern sounds. Beginners often overlook this, but a small change here can make a noticeable difference to how a ride cymbal sings.
- Round tip: produces a clear, focused sound with a defined attack. A very forgiving shape for cymbal work and general playing.
- Acorn tip: a classic shape that gives a warm, full tone. Popular and a safe first choice.
- Barrel tip: wider contact surface, which gives a fuller, louder sound, especially on cymbals and toms.
- Teardrop tip: a bit softer and broader, with a rounder cymbal wash. Pleasant on rides and crashes.
- Oval tip: gives a bit more articulation than a barrel and is common on jazz-oriented models.
If you only try one thing, try an acorn or round tip. Both are easy to control, and neither shouts too loudly about its shape. As you learn which sounds you like, you can branch out.
Wood Tips vs. Nylon Tips
Beyond shape, tips come in two main materials. Wood tips are carved from the same piece as the shaft, while nylon tips are a separate piece attached at the end.
Wood Tips
These give a warmer, slightly darker tone, especially on cymbals. The drawback is that they chip. A sharp chip can scratch a drumhead or produce an irritating, scratchy sound on a ride. If a wood tip starts to splinter, it is time to retire the stick or to trim and sand it carefully.
Nylon Tips
Nylon gives a brighter, more defined “ping” on cymbals, and it does not chip. That makes it a durable choice for beginners who are still learning where to aim. The downsides: nylon can sometimes loosen or come off, and the brighter sound might be a bit harsh on thin or already shrill cymbals. Over a long period it can also develop a slightly rough surface that wears on lighter heads.
Rule of thumb: if you tend to hit the rim or play in a loud band, nylon tips can save you money. If you like a mellow, natural cymbal sound, stay with wood.
Finish and Grip
You will see sticks labelled as natural, lacquered, matte or coated. This small detail has a real effect on comfort.
- Lacquered: smooth, glossy and a little slippery when your hands get sweaty. Some people love the speed; others feel they lose control.
- Natural or raw: the wood is left unfinished, so it absorbs moisture and gives a more tactile grip. Good for beginners who tend to sweat.
- Matte or satin: sits in between and offers a bit of tack without the roughness.
- Coated or textured: designed to stay put even when wet. Handy for hot rooms and long gigs.
A sticky or tacky grip can help early on, but it can also encourage you to squeeze. The goal is a relaxed hand that lets the stick bounce. If you notice white knuckles or sore fingers, step back and check whether the stick, or your grip, is the culprit.
Weight and Balance: The Part You Cannot See
Two sticks with the same label can feel very different. Weight and balance point (where the stick feels like it pivots) change how it rebounds. A stick that is front-heavy feels like it falls toward the drum and delivers a punchier hit. A stick with its balance further back feels lighter and more controllable.
For a beginner, a neutral balance is easiest. A stick that rebounds naturally helps you develop the relaxed bounce that rudiments such as the double stroke roll rely on. A stick that fights you will make you tense up, which leads to bad habits that take time to unlearn.
How to Test Sticks in the Store
Buying drumsticks online is convenient, but a few minutes in front of the bin can save you from a poor purchase. Here is a simple routine.
- Roll each stick on a flat surface. A glass countertop or a smooth table works well. If the stick wobbles or curves, it is warped. Reject it.
- Hold the pair at the middle and tap them together. A matched pair should give a similar pitch. If one sounds noticeably higher, the densities probably differ.
- Check the tips. They should be symmetrical, free of cracks, and match in size.
- Find the balance point. Rest each stick on your finger and note where it balances. It should be at about the same spot on both.
- Play a few strokes on a pad if the store allows it. Pay attention to how the stick bounces and how your hand feels after ten or twenty seconds.
- Compare two sizes. Try a 5A against a 7A or 5B. You will usually feel which is right within a minute.
If you buy online, choose a well-known maker, order a couple of different sizes, and plan to return or keep extras as backups. Sticks are cheap enough that testing is part of the learning process.
Specialty Sticks: Brushes, Rods and Mallets
You will see other tools beside regular sticks, and some beginners wonder if they need them right away. In short, no.
- Brushes: wire or nylon bristles for soft, swishing textures in jazz and ballads. Fun to explore later.
- Bundled rods (hot rods): thin dowels bound together that give lower volume with some of the stick feel. Useful for quiet practice, though they change the rebound.
- Mallets: felt-headed sticks for cymbal swells and orchestral effects.
Master the basics with one pair of regular sticks before collecting extras. Your technique will benefit more from consistency than from variety.
Matching Sticks to Musical Style
Style is not a hard rule, but it gives useful clues.
- Rock and pop: 5A or 5B with a round or acorn tip works well. Hickory handles the energy.
- Metal: 5B or 2B for the extra mass, often with nylon tips for cymbal clarity and durability.
- Jazz: 7A or a light 5A, with a teardrop or oval tip for ride cymbal articulation.
- Funk and R&B: a 5A or 7A for quick ghost notes and subtle dynamics.
- Marching and rudimental: specific marching snare sticks, usually longer and heavier. Your band director will often tell you exactly which model to buy.
If you do not know yet what you want to play, a 5A is the safe default. You can adjust once your tastes become clear.
Practice Habits That Protect Your Sticks and Your Hands
Even a perfect pair needs good habits behind it. Here are some points that help sticks last and keep your hands healthy.
- Avoid unnecessary rim shots. Hitting the metal hoop is the fastest way to splinter a stick.
- Rotate your sticks. Turn them occasionally so wear spreads evenly rather than concentrating on one side.
- Keep a spare pair in your bag. Sticks break at the worst time, usually the day before a rehearsal.
- Store them flat or hanging. Leaning them in a damp corner can lead to warping.
- Loosen your grip. Hold the stick between thumb and index finger near the balance point, with the other fingers wrapped lightly. The stick should bounce back off the head, not be forced down.
- Watch for pain. Soreness in the wrist or forearm is a signal to rest, check your posture, or test a different size.
The Percussive Arts Society is a respected international organization that supports percussionists with educational material, rudiment references and community resources. It is a good place to look once you want to go deeper into technique and repertoire beyond the beginner stage.
Budget: What to Expect to Pay
A pair of regular drumsticks from a reputable maker usually falls in the range of about eight to twenty dollars, depending on the model and the finish. Multi-pair packs often reduce the cost per pair, which is sensible for a new player who will drop sticks, chip tips and experiment. Boutique or signature models can cost more, but there is no need to start there.
A reasonable beginner shopping list looks like this:
- Two pairs of 5A hickory sticks with wood tips, so you have one in use and one as a backup.
- One pair of 7A or 5B for comparison, depending on your hand size.
- A simple stick bag or a loose pouch, so your sticks do not roll around in a gig bag and chip each other.
Many players find their preferred model within a few months, and the cost of that trial is small compared with the price of a cymbal or a drum.
Common Beginner Mistakes to Avoid
Buying Too Thick Because “Pros Use Them”
Seeing a drummer swing massive sticks on stage can lead you to assume heavier equals better. For a developing player, extra weight often causes tension and slows you down. Start lighter and move up if you actually need more power.
Ignoring Warped Sticks
A slightly curved stick can feel fine in the hand, but it will bounce unpredictably. If you notice that rebounds feel inconsistent, check the stick on a flat surface before blaming your technique.
Switching Models Constantly
Trying different sizes is smart. Swapping every week is not. Give a pair at least a couple of weeks of regular practice before deciding if it suits you, because your hands need time to adapt.
Using Worn-Out Tips
A splintered tip can scratch heads and produce a harsh cymbal sound. Sticks are cheap, so replace damaged ones rather than fighting the noise.
Gripping Too Hard
No stick can fix a death grip. If your hands tense up, slow down, loosen your fingers, and let the stick do the bouncing. Sometimes a lighter, thinner stick helps you feel what relaxation is supposed to be like, which then carries over to any size.
A Simple Decision Path
If all those options feel like too many, follow this quick path.
- Pick hickory for durability and comfort.
- Choose 5A if you are an average-sized adult or teenager; choose 7A for small hands or kids.
- Select an acorn or round wood tip for a balanced tone.
- Prefer a natural or matte finish so your grip stays secure.
- Test for straightness and matching pitch, then buy two pairs.
- Play for a few weeks, note what feels too heavy, too light, too slippery or too bright, and adjust one variable at a time.
Changing a single factor at a time is the trick that makes this process useful. If you swap size, wood and tip all at once, you will not know which change made things better or worse. Treat it like a small experiment, and within a handful of sessions your hands will tell you what works.
Remember that no stick can replace practice, but the right one removes friction. When the pair in your hands feels natural, you stop thinking about the equipment and start thinking about the groove, which is exactly where a beginner wants to be.
Deixe um comentário