
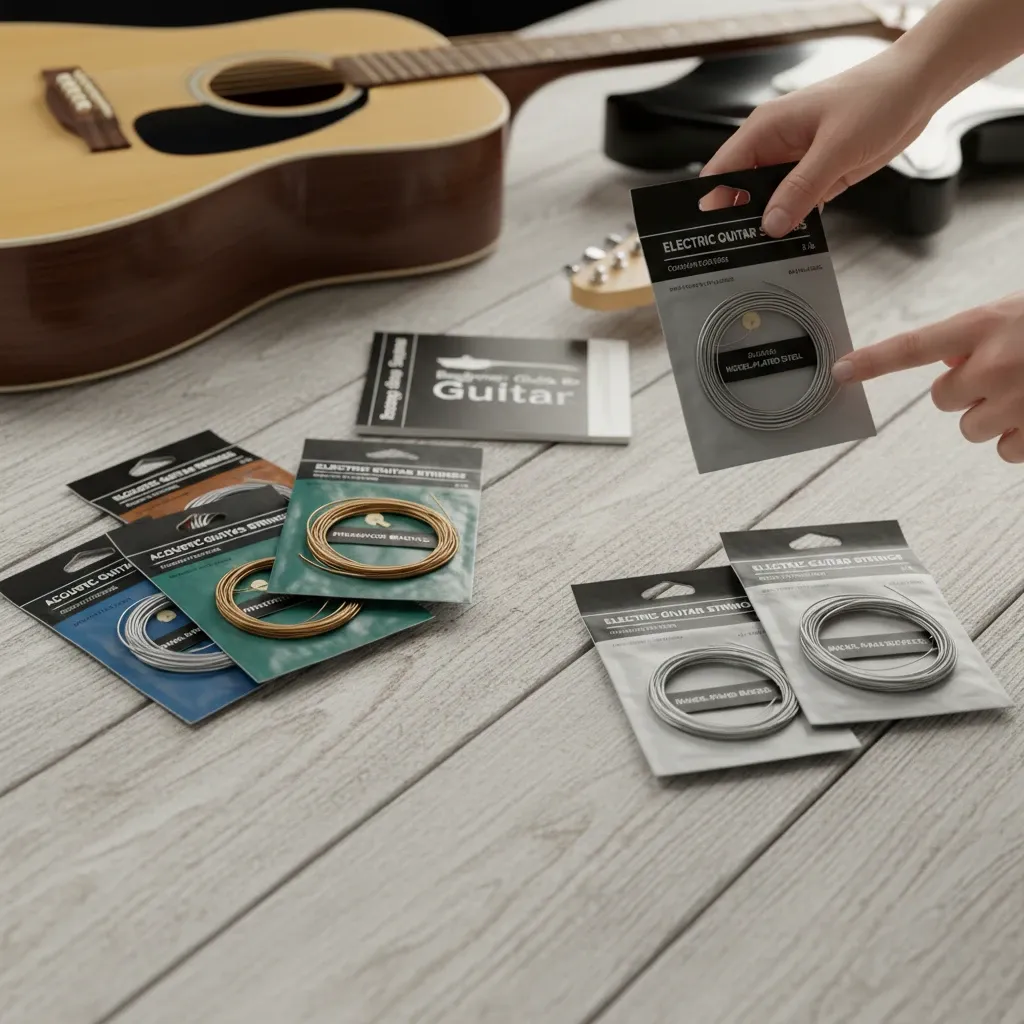
Walk into any music shop and head for the string wall, and you’ll see hundreds of little envelopes covered in numbers, metal names and bold promises. Nobody warns you about this when you buy your first guitar. You spend weeks picking the instrument, and then a sheet of tiny packets decides whether practice feels pleasant or painful. The good news is that choosing strings is far less mysterious than it looks. Once you know four things (your guitar type, the gauge, the material and the coating), the wall shrinks to a handful of sensible options.
This guide walks through those four decisions in plain language, with specific sets to look for, mistakes to dodge and a step-by-step method for fitting the new strings. If you’ve ever winced at sore fingertips or wondered why your guitar sounds dull after a month, you’re in the right place.
Why Strings Matter More Than Most Beginners Think
Strings are the only part of a guitar your fingers and pick touch all the time. They decide how hard you must press, how easily a chord rings out, how long the tuning holds and how bright or warm the instrument sounds. A mediocre guitar with fresh, well-matched strings often plays better than an expensive one wearing rusty, mismatched strings.
For a beginner, this matters even more. Early practice is mostly a battle with finger pain and frustration. Heavy strings on a guitar with a high action can make a simple G chord feel like a punishment, and plenty of people quit in the first three months for exactly this reason. The right set won’t make you a virtuoso, but it removes needless obstacles.
String design has a long history. Early guitars used gut strings, and metal-wound and steel strings spread widely only in the late 19th and early 20th centuries, which helped create the louder acoustic and electric instruments we know today. If you’re curious about how the instrument evolved, the Encyclopaedia Britannica entry on the guitar gives a solid overview.
Step One: Identify Your Guitar Type
This is the single most important rule, and skipping it causes the most expensive mistakes. Guitars are built for a particular kind of string, and the three main families are not interchangeable.
Steel-String Acoustic Guitars
These are the familiar folk and pop acoustics with a narrow neck and a metal bridge pin setup. They take steel strings, with the two or three lowest wrapped in bronze-type alloys. The tension is high, which gives a bright, projecting sound but demands more finger strength.
Classical (Nylon-String) Guitars
Classical and flamenco guitars have a wider, flatter neck and strings that are tied, not pinned, at the bridge. The three treble strings are nylon (or similar clear synthetic material) and the three bass strings are silver-plated copper wound over a nylon core. The tension is much lower, so they’re gentle on the fingertips. Never put steel strings on a classical guitar. The neck and bridge aren’t designed for that tension, and you risk lifting the bridge or warping the neck.
Electric Guitars
Electric guitars need strings that can be detected by magnetic pickups, which means steel or nickel-based alloys. Because the amplifier does the heavy lifting on volume, electric strings are usually thinner and easier to bend and fret than acoustic ones.
Some guitars are hybrids. A semi-acoustic or an acoustic-electric with a steel-string body still takes acoustic strings. If you aren’t sure what you’ve got, check the headstock for a brand or model name, look at the bridge, and read the product page where you bought it. A quick search of the model name usually settles it.
Step Two: Understand String Gauge
Gauge is the thickness of a string, measured in thousandths of an inch. A pack labelled "10-46" means the thinnest string (high E) measures .010 inches and the thickest (low E) measures .046. Thinner strings are easier to press and bend but sound a little thinner and can break more readily. Thicker strings sound fuller and hold tuning with more authority but demand more finger power.
Common Electric Guitar Gauges
- Super light (9-42): The easiest on the fingers and great for bending notes. Ideal for small hands, young players or anyone struggling with soreness. The sound is a bit slim, and the strings can feel floppy if you pick hard.
- Regular light (10-46): The industry’s default and the best starting point for most beginners. It balances comfort with a solid tone.
- Medium (11-49): Fuller sound and better for lower tunings, but noticeably harder to fret. Better saved for later.
Common Steel-String Acoustic Gauges
- Extra light (10-47): Very comfortable, with softer volume and a lighter, sweeter tone. A smart choice for hands that blister easily.
- Custom light (11-52): A friendly middle ground that gives many beginners the best of both worlds.
- Light (12-53): The standard on most acoustic guitars and the most common option in shops. Rich sound, but demands a bit of finger toughness.
- Medium (13-56): Loud and full, popular with strummers and bluegrass players, but tough on beginner fingertips.
Classical Guitar Tension
Classical strings aren’t sold by gauge in the same way. They come in normal (medium) tension, hard (high) tension and sometimes low tension. Normal tension suits nearly every beginner. Low tension is a good option for small hands or for a guitar with higher action, while hard tension projects more but needs more effort.
A Quick Rule of Thumb
If your fingers hurt a lot after fifteen minutes of practice, drop down one gauge. If the guitar sounds buzzy and floppy or the strings feel like noodles, move up a size. Most beginners find their comfort zone within one step of the standard light set.
Step Three: Pick the Right Material
The metal in a string changes its tone, its feel and how quickly it corrodes. You don’t need a metallurgy degree, just a rough idea of what each type does.
Acoustic Guitar String Materials
- 80/20 bronze: Made from 80% copper and 20% zinc. It sounds bright and crisp, almost sparkling, when new, but that brightness fades fairly quickly as the alloy oxidizes.
- Phosphor bronze: A bronze alloy with a small amount of phosphorus added to slow corrosion. It sounds warmer and more balanced and lasts longer than 80/20. This is the safest recommendation for a first acoustic set.
- Silk and steel or other hybrid sets: These use a softer core and lower tension for a mellow sound and gentle feel. They are popular for fingerpicking, and some beginners love them for their comfort, though the tone is quieter and less punchy.
Electric Guitar String Materials
- Nickel-plated steel: The most common choice. A nickel coating over a steel wire gives a balanced tone with a little brightness and good magnetic response. It’s a reliable all-rounder for rock, blues, pop and indie.
- Pure nickel: Warmer and rounder, with a vintage feel. Players who like classic blues or soft jazz tones often prefer it.
- Stainless steel: Very bright and resistant to rust, with a slick feel. Good for sweaty hands, though the sound can be harsh on already bright guitars.
Nylon Guitar String Materials
For classical guitars, bass strings are usually silver-plated copper wire. The treble strings come in clear nylon, carbon-fiber-type materials (such as fluorocarbon) or other synthetics. Clear nylon is warm and traditional and is a perfectly sensible beginner choice. Carbon-type trebles sound brighter and more projecting, and they’re more consistent in tuning, but they cost more.
Step Four: Know the Winding Style
The wound strings (the thicker ones) come in different constructions, and you can usually feel the difference immediately.
- Roundwound: The standard. A round wire is wrapped around the core, creating a slightly ridged surface. It’s bright and lively, and it is what almost every beginner set uses.
- Flatwound: Wound with a flat ribbon, producing a smooth feel and a dark, mellow tone. Used mostly in jazz and on some vintage-style electrics. They’re less bright and less forgiving of mistakes, so they aren’t typically a first pick.
- Half-round (ground wound): A hybrid, ground smooth after winding. It offers a compromise between the bite of roundwounds and the smoothness of flatwounds.
For your first set, roundwound is the straightforward answer. The finger squeak you hear when you slide along the neck comes from this ridged surface, and it’s perfectly normal.
Coated Versus Uncoated Strings
Some strings come with a very thin polymer layer that slows down corrosion caused by sweat, skin oils and humidity. Others are plain metal. Which is better depends on your habits and budget.
Pros of Coated Strings
- They stay fresh-sounding for several times longer than uncoated sets.
- The smoother surface reduces finger squeak and can feel pleasant under the fingertips.
- They’re a good choice for players with acidic sweat, people living in humid places or anyone who plays daily and hates restringing.
Cons of Coated Strings
- The price per set is noticeably higher, often double or more.
- Some players find the tone a touch subdued when new, and the slick feel isn’t to everyone’s taste.
- When they do die, they tend to go quickly instead of fading gradually.
Pros and Cons of Uncoated Strings
Uncoated sets are cheaper, brighter on day one and wonderfully easy to buy anywhere. The price you pay is a shorter life: after a few weeks of regular playing, they can feel gritty and sound dull. For a beginner who’s still learning how often to change strings, the low price makes uncoated sets a sensible place to start. You can always upgrade to coated strings once you’ve figured out your preferences.
How to Read a String Pack Without Getting Lost
The packaging usually tells you everything if you know where to look. Check these details in order:
- Instrument type: acoustic, electric, classical, bass or 12-string. Make sure it matches your guitar.
- Gauge numbers: for example "10-46" or "12-53", or a tension rating for nylon.
- Material: phosphor bronze, nickel-plated steel and so on.
- Coating: look for words like "coated" or "treated" if you want longer life.
- End type: steel strings have ball ends. Classical strings sometimes come with ball ends too, but traditional sets have plain ends to be tied. Make sure you know which your bridge needs.
Some sets are marketed with descriptions like "bright", "warm" or "balanced". Treat these as hints and not guarantees, since your guitar’s wood and body shape affect the final sound more than the label.
Starter Recommendations by Guitar Type
If you don’t want to experiment, these default setups work for the majority of beginners.
Beginner Acoustic Guitar
Choose a phosphor bronze set in custom light (11-52) or light (12-53). If your fingertips are soft, your hands are small or your action is high, go for extra light (10-47) for the first few weeks.
Beginner Electric Guitar
A nickel-plated steel set in 10-46 is the reliable pick. If you plan to bend notes constantly or have small hands, try 9-42. Many starter electric guitars ship with 9s or 10s, so check what’s already on there and keep the same gauge when you replace them, which avoids neck adjustments.
Beginner Classical Guitar
Buy a normal-tension nylon set with clear nylon trebles and silver-plated basses. It’s the safe bet and nearly always the right answer.
Left-Handed Players
The same strings generally work for left-handed guitars. You simply restring the guitar in the same order, with the thickest string closest to your face when you hold it, just like a right-handed model.
Common Mistakes to Avoid
- Putting steel strings on a nylon guitar. This is the most damaging error. Always check before buying.
- Jumping up to heavy gauges to sound more professional. Heavier strings don’t make you better. They make your hand ache.
- Changing gauge dramatically without a setup. A big jump in thickness changes neck tension and can cause buzzing, intonation trouble or even binding in the nut slots. Small steps rarely cause problems.
- Buying the cheapest unnamed strings. Poorly made strings can sound out of tune on the high frets, break at the ball end or corrode within days.
- Never changing them. Old strings go dull, lose tuning stability and make you think your guitar is a bad one. It often isn’t. The strings just need replacing.
- Ignoring the tools. A cheap string winder and clippers save a lot of aggravation.
How Often Should You Change Your Strings?
There’s no universal timetable, because it depends on how much you play and how your body chemistry affects metal. A rough guide:
- Uncoated strings, daily play: every 3 to 6 weeks.
- Uncoated strings, a few hours a week: every 2 to 3 months.
- Coated strings: often 3 to 5 times longer than uncoated ones.
- Nylon strings: every 3 to 6 months, or sooner when the wound strings go dull or the trebles begin to fray or lose intonation.
Tell-tale signs that a set has passed its prime include discolored or rough patches on wound strings, a flat or dead tone, strings that won’t hold their tuning, and notes that sound out of tune as you move up the neck. A quick wipe-down with a dry cloth after every session extends the life of any set.
How to Change Strings Step by Step
Fitting strings is a skill you’ll pick up in one afternoon. Here is a clear method for a typical steel-string acoustic or electric guitar. Classical guitars differ because the strings are tied at the bridge, but the overall approach is similar.
- Gather your tools. You’ll need new strings, a string winder, wire cutters and a clip-on tuner. A soft cloth is useful for cleaning the fretboard.
- Work one string at a time, or remove all of them. Changing one at a time keeps the neck tension steady and helps beginners remember the routing. If you want to clean the fretboard, remove all strings, wipe it down and then fit the new ones.
- Loosen and remove the old string. Unwind the tuning peg until the string is slack, then pull it out of the bridge. On acoustics, a bridge pin may need a gentle lift, and a winder with a built-in pin puller helps.
- Insert the new string. Seat the ball end in the bridge (with the pin on an acoustic, or through the body or tailpiece on an electric). On an acoustic, line up the groove in the pin with the string and pull gently until the ball end locks against the bridge plate.
- Thread through the tuning post. Pull the string up to the correct tuner, leave a gap of about two to three inches of slack, and bend it back on itself. Then feed it through the hole in the post.
- Wind it neatly. Turn the tuner so that the string winds downward on the post. Aim for two or three tidy wraps on the thinner strings and a little less on the thicker ones. Keep tension on the string while you wind.
- Tune up and stretch. Bring the string to pitch, then gently pull it away from the fretboard at several points along its length. It will drop flat, so retune. Repeat a few times until it stays put.
- Trim the excess. Cut the extra string close to the post, but leave a short end so it can’t slip out. Be careful, because cut ends are sharp.
Expect new strings to keep drifting for a day or two. That’s normal and not a sign that you made an error.
Budget: What Should You Actually Spend?
A reliable set of uncoated strings from a well-known maker is inexpensive, usually the price of a sandwich or a bit more. Coated sets cost more but last longer, so the per-week cost is often similar. As a beginner, don’t blow your budget on premium boutique sets. A decent mid-range pack, bought in a spare as well, is a better investment than a single costly one. Buying two or three sets at once is usually cheaper, and it means a snapped string won’t end your practice session.
Keep spare strings in the guitar case, because the high E and B strings break most often when you’re tuning up or practicing bends.
Comfort Tips That Help Whatever Strings You Choose
- Ask for a setup. A professional can lower the action, adjust the neck and check the nut slots, which can make strings feel dramatically easier. It’s often the cheapest upgrade a beginner can make.
- Build calluses gradually. Short, regular sessions beat one long weekend marathon. Ten to twenty minutes a day is more effective than two hours once a week.
- Use lighter strings for the first month. You can step up later when your fingertips are tougher.
- Keep the guitar in a stable environment. Big swings in humidity and temperature affect both strings and wood.
- Wash and dry your hands before playing. It’s simple, and it noticeably slows down corrosion.
Your Quick Decision Checklist
Before you click "buy" or head to the till, run through this short list:
- Confirm whether your guitar is steel-string acoustic, classical or electric.
- Pick a comfortable gauge: 10-46 for electric, 11-52 or 12-53 for acoustic, normal tension for classical.
- Choose a safe material: nickel-plated steel for electric, phosphor bronze for acoustic, clear nylon with silver-plated basses for classical.
- Stick with roundwound unless you have a specific reason not to.
- Decide between coated and uncoated based on budget and how often you want to restring.
- Buy a spare set, and a winder and cutters if you don’t already own them.
Strings are cheap, replaceable and endlessly forgiving, so you can’t really get this wrong for long. Try a set, pay attention to how it feels under your fingers and how the guitar answers, and adjust next time. Within a few changes you’ll know exactly what you like, and the wall of little packets will look like a familiar menu and not a puzzle.




Deixe um comentário